
Home : CNC : Shapeoko : 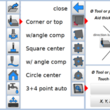 Touch probing is an easy way to set the cutting tool origin to the corner or center and/or top of the workpiece. Touch probing is basically a switch that sets an axis to zero based on when the grounded probe/tool (the double insulated Dewalt router needs a ground wire clipped to the tool) touches a piece of aluminum connected to the 5v probe port on the controller board (via the cable with a DC socket on the end). Accuracy depends on how accurate the entered dimensions for the probe/tool and aluminum are. There is a 6.35mm/1/4" drill rod probe (for straight bit X,Y 0), but spiral bits also work well as probes (depending on the bit, it may need to be rotated slightly to insure contact just behind the cutting edge).
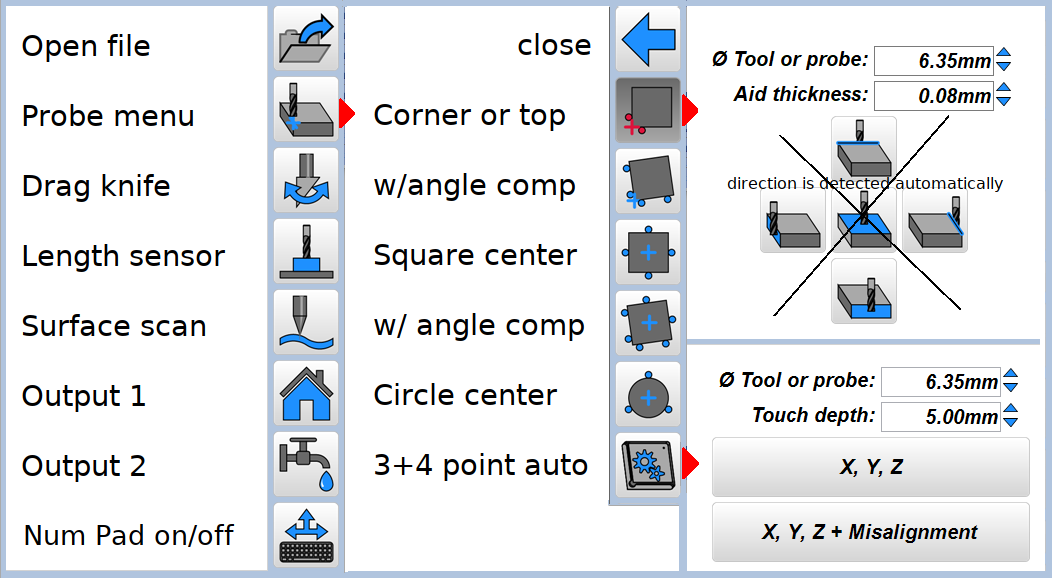
The only Estlcam settings that may need to be changed are probe/tool diameter (edge/corner finding only) and aid thickness. This applies to all probe options, almost all of the other settings are for probing on machines without a probe port. The aid thickness is preset when using the 3-axis touch plate (5mm X and Y, 6mm Z), enter 6mm when using it (upside down) for manual Z probing. The .08mm (aid thickness) aluminum tape can be used for all manual probing.
Manual probing: Slowly jog (arrow keys only) the axis you want to zero until the probe touches the tape or plate and stops. Release the key and the tool/probe will back off 5mm. Be careful not to ground the red/5v alligator clip (or 3-axis touch plate) and remember to attach/remove the ground clip to/from the tool. After probing you can enter the XY command to move the router to the X,Y origin. The 3-axis plate can be used for finding the center of rectangular material using the 4 or 6 point probe options (round center is tape only).
Automatic corner probing (12sec video): Place the 3-axis touch plate on the front left corner of the workpiece, jog the probe to ~3/4" away from the front-and left edges of the plate (if it's still there, inside the magic marker corner mark), plug in the plate and clip the ground lead to the probe before clicking the top autoprobe option (the plate is too small for angle compensation). When using the probe rod, replace it with the desired tool and manually probe Z to zero it.
While touch probing Z is the easiest way to zero it, eyeballing the X and Y tool position (e.g. to the front-left corner of the material) and right clicking on the X and Y coordinates will zero them.
Add Comment
Here you can comment on the following topic by using the form below it.
Touch Probing
 Touch probing is an easy way to set the cutting tool origin to the corner or center and/or top of the workpiece. Touch probing is basically a switch that sets an axis to zero based on when the grounded probe/tool (the double insulated Dewalt router needs a ground wire clipped to the tool) touches a piece of aluminum connected to the 5v probe port on the controller board (via the cable with a DC socket on the end). Accuracy depends on how accurate the entered dimensions for the probe/tool and aluminum are. There is a 6.35mm/1/4" drill rod probe (for straight bit X,Y 0), but spiral bits also work well as probes (depending on the bit, it may need to be rotated slightly to insure contact just behind the cutting edge).
 The only Estlcam settings that may need to be changed are probe/tool diameter (edge/corner finding only) and aid thickness. This applies to all probe options, almost all of the other settings are for probing on machines without a probe port. The aid thickness is preset when using the 3-axis touch plate (5mm X and Y, 6mm Z), enter 6mm when using it (upside down) for manual Z probing. The .08mm (aid thickness) aluminum tape can be used for all manual probing.
Manual probing: Slowly jog (arrow keys only) the axis you want to zero until the probe touches the tape or plate and stops. Release the key and the tool/probe will back off 5mm. Be careful not to ground the red/5v alligator clip (or 3-axis touch plate) and remember to attach/remove the ground clip to/from the tool. After probing you can enter the XY command to move the router to the X,Y origin. The 3-axis plate can be used for finding the center of rectangular material using the 4 or 6 point probe options (round center is tape only).
Automatic corner probing (12sec video): Place the 3-axis touch plate on the front left corner of the workpiece, jog the probe to ~3/4" away from the front-and left edges of the plate (if it's still there, inside the magic marker corner mark), plug in the plate and clip the ground lead to the probe before clicking the top autoprobe option (the plate is too small for angle compensation). When using the probe rod, replace it with the desired tool and manually probe Z to zero it.
While touch probing Z is the easiest way to zero it, eyeballing the X and Y tool position (e.g. to the front-left corner of the material) and right clicking on the X and Y coordinates will zero them.